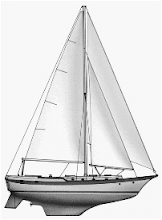
Warning - Anyone who does not own a CSY sailboat may not care about this post. Feel free to skip it - honest you will not hurt my feelings.
Note to CSY owners - The Crosby refrigeration unit found on the CSY 44 was giving me trouble and was leaking freon so I had a choice. Either repair the unit (and repair the unit, and repair the unit, etc) or replace it. I know refrigeration is closely aligned with religion to a sailor and a number of you will say - Replace that great old refrigeration system, are you crazy? I looked around and finally decided to replace it. You may want to keep yours. That is why they make chocolate and vanilla.
This is what I did:
Icebox - the first thing I did was cut down the ice box / freezer. Did I really need 21 cubic feet of refrigeration? I have that much at home. First I took out the third refrigerated box (one closest to the stern). I actually cut out the box and removed it. It was a chore but now I have more engine room space (like I needed that). I found a lot of water in the first inch of insulation closest to the box itself. Removing the box actually let me drain this water out of the insulation and hopefully makes the remaining two boxes more efficient.
At the same time I also decided to get rid of the sloping bottom of the ice boxes. The sloping bottom was for block ice. You put the block in the bottom and then stacked your food on
 top. This would give you several days of refrigeration (boy have we come a long way). Just think every couple of days you had to unload your refrigerator and put in a new block of ice. Those were some tough sailors.
To do this I made my own vacuum panels. I don't know how well they will work over the long haul but at least they have multiple layers of refective material, insulation, and waterproofing. Hopefully they will give the bottom of my refrigerators a good bit more insulation.
To build my vacuum panels first I took the blue foam you can buy at your
 local hardware store and cut up a few panels that would fit the bottom of the box. I did it so there was about an inch of vertical space between the panels. I put PVC spacers (actually 1/2" pipe couplers) in between the blue foam and used foil air conditioner tape to hold everything together. I then wrapped the whole thing in the foil coated bubble
 wrap so I had a reflective barrier on both the top and the bottom of the foam and the air gap. Finally I encapsulated the whole mess in one of those space b
 ags and drew a vacuum on it with my shop vac (yes I know it is not a true vacuum - it was not going to hurt anything and it has the side benefit of keeping everything dry).
I then
 put a reflective layer on the bottom of old refrigerator box. I did this by taking one of the cold bags you can buy at the supermarket and cutting out the plastic foil liner. I taped it into the bottom of the refrigeration box. I also drilled a hole between the boxes to allow any water to drain into the middle box (it already had a drain and I left it open). I then put in two layers of the vaccume boards.
Finally I added a plastic floor on the bottom. I glassed this in. There are no drains in the current box to let my nice cold air seep out into the bildge. You will also notice that I left the old cold plate in the back of the refrigerator. My theory was that this would allow the cold to creep between the freezer and the refrigerator
 . I left the holes where the Crosby lines ran through the bulkhead. (This actually worked out quite well).
For the refrigeration system I chose an EZ Kold box style holding plate. With these holding plates the opening is on the top of the holding plate and the rest is formed around the sides to make a box. I have a stainless steel lid on the top of the box. Marvin will make a box any size you want (within reason). I have a 10DX15WX16H Box. It keeps Ice frozen. You can mix up a Margareta and put it in the box - 20 minutes later you have frozen Margaritas. I have been impressed with this unit. I mounted the box in the (formerly middle) refrigerator and the compressor in the space left by removing the old freezer. It is water and / or air cooled so if you clog the through hull you don't lose your refrigeration. I spent 1.5 months in the Abacos and the system worked well. We had ice every night in our drinks.
Since I now had new refrigeration I needed to top it off in style. I took the old lids and cut off the
 top 1/2". It was rather easy. All I did was put my fence on my table saw, place the top on the fence, and cut the top off. To my surprise much of the top was empty of foam (this is a view of the lid with the top removed. I have already added a little of the foam in a can to the lower right hand side of the picture). You might want to check your lids. I imagine you can knock on them and hear the difference.
I then added a nice oak top t
 o the lids. I made this by putting together oak flooring and then attaching it to a piece of plywood that was designed to fit inside the the fiberglass lid. I used the two part epoxy you see on bars to make the whole thing looks very nice.
I polished the brass handles and attached them at the front of the lids. I added hinges to the back of the lid so I could open them easily and not have to juggle the lid while I looked in the refrigerator / freezer. I then added a hydraulic shock inside the box to keep the lid from falling down while I am
 looking inside the box (@ $20 at Autozone).
As you can see I added lots of insulation around the door - three different strips. It seems to work but I need to figure something else out because it does not pass the dollar bill test all the way around. I also added Lexan shelves that slide front to back. There is a cotter pin on a string that keeps them from sliding when I am off shore.
Now my saying is "nothing is done until it is over done" - I put inside the top of the refrigerator LED rope lights and I wired them to a magnetic switch that causes them to come on when either door was opened. That way I have light down in my refrigerator / freezer. In case your thinking - "what happens if the light does not go off?" I put a telltail red LED light right above the refrigerator so when the telltale light is on then I know the refrigerator light is on. The rope light is in a plastic channel that you can buy at Lowes / Home Depot. I got the 12V rope light off of ebay (2.8W / meter - wow).
If I had to do it all over again I would have electopolished the holding plate before it went in. My theory is this would allow me to easily scrape off the ice on the holding plate when it accumulates. Right now I am using a regular windshield ice scraper. The next time I defrost the box I plan on waxing the holding plate. I will let you know how that works. Feel free to call me if you have any questions. Just click the call me button on the right hand side of the page. You don't get my number but I get the call.
UPDATE - I have found spraying the holding plate with silicon helps to remove any ice build up. I am not sure how food safe this is so be careful.


No comments:
Post a Comment